Brown Thumb
/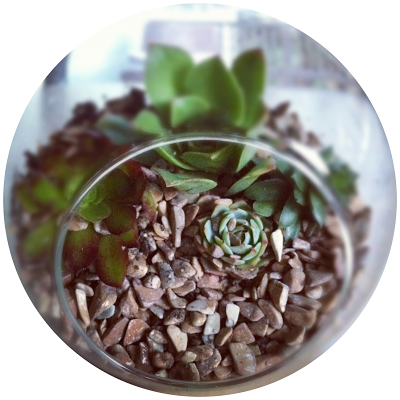
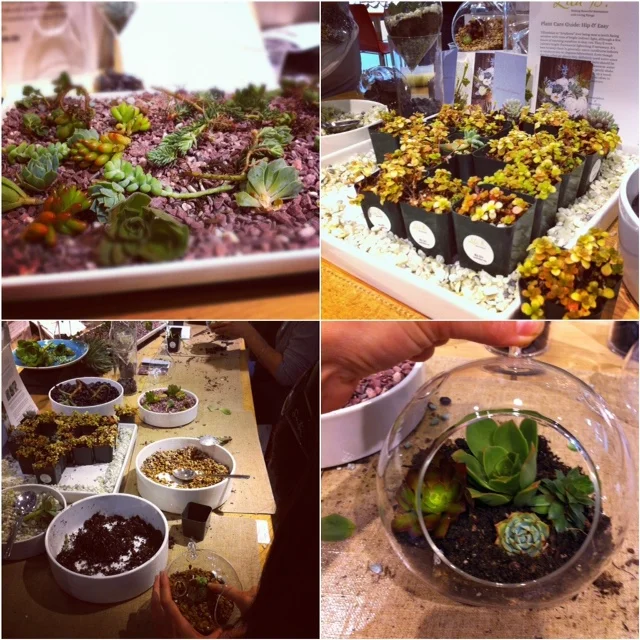
I learned all about planting succulents this weekend at the CB2 DIY Saturday from the folks at Lila B. a sustainable floral design studio specializing in succulents and carnivorous plants. It was an informative, interactive event, and I got to take home my own DIY tiny terrarium for about $7 which included soil, rocks and succulents.


The session started with a guide to planting succulent container arrangements. The trick is to select a variety of succulents, some that have height, some that act as ground cover and some that spread and drape over the container as they grow. Start with a container with a hole drilled in the bottom. Apply a small layer of rocks to the base and mix regular potting soil with sand to aid in drainage. Succulents store water in their thick leaves, they do not thrive with a lot of wet soil on their roots. Pack the plants tightly, and really loosen the roots from pre-potted plants. Water sparingly. My kind of plant.
For the terrarium, employ the same concept, using rocks on bottom and top layers to hold the soil in place. With the CB2 terrarium, build the soil up the back side for depth, as the front opening is really shallow (as seen is the second picture). I chose different pups (the offshoots from larger plants) that reminded me of rosettes.
The most helpful tip I learned was to pluck the pups from larger plants, leave them out for the stem to callous over and then replant. You could have a huge succulent garden in a matter of months. You can also spiff up your home by planting the pups into cracks in your walkway and concrete walls.